White Loaf of Bread
I found this recipe here
and have made a few slight changes along the way. Generally, I will make this once a weak for my sandwiches during the
week. Maybe it is just me, but I find the process of kneading dough
relaxing.

Ingredients
- 3 cups of all purpose flour, another ~1/2 cup of APF for kneading
- 1 3/4 cups of lukewarm water, 1/4 cup separated for the yeast
- 7 g packet (2 3/4 tsp) of active dry yeast
- A little bit of honey
- 1 tsp of salt
- Italian seasoning (optional)
- Fresh basil (optional)
- Some olive oil, for greasing
Tips
- Tips on kneading dough can be found here.
- Adding the water can be a bit tricky. If you add too much then the dough becomes wet and you will need to add more flour when kneading. I find it best to add the water in sections and slowly mix it in.
- If you are going to be making a lot of bread or other recipes that require yeast. You should consider buying it in the jars (or 1 kg packs at Costco). Store the jar in the fridge (Extra jars can go in the freezer for longer times), and when you want to use put the necessary amount in a small container and allow it to warm up before placing in water.
- I find that the loaf starts to go stale after three days. So what I do is cut it into slices and store in the freezer. Then in the morning I just take out two slices and make my sandwhich. It defrosts fine in the fridge by noon.
- Need an idea for what to do with the ends of the loaf try making mini pizzas. They are great for when you want a small snack.
Instructions
- Measure out the amount of yeast and water into multiple containers. Two containers for the water and 1 for the yeast. If you are using the packages and not a jar of yeast then the container for the yeast is not necessary (more information on why in Step 2 and Tip 3).
- I mix a bit of honey into the container holding the 3/4 cup of water
to be mixed with the yeast. The sugar helps the yeast to grow.
Normally, I wait 15 minutes before mixing the yeast with the water since
I store mine in the fridge. This gives it time to come to room
temperature. As well, if you are worried that your water is too hot/cold
this gives it some time to become room temperature.

- Mix in the yeast with the 3/4 cup of water and mix it around. You should
see some bubbles forming. Give it about 15 minutes to foam and at least
double in size.


- While waiting for the yeast to foam take a large bowl and place in the
flour and salt. Also, feel free to add some italian seasoning and if you
have some fresh basil leaves cut them up and place in as well. Then
shake softly to mix it all together.

- Pour the yeast/water mixture into the bowl and pour in about half of the
other container of water. I like to pour the water into the jar that
previously held the yeast/water so I can add the left over yeast foam
that was left in the jar. Mix this flour-water mixture with a fork. Add
the rest of water slowly and keep mixing till you get a ball of dough.


- Place flour on a table/cutting board and using the fork place the dough
ball ontop. Take the empty bowl and place in sink and fill with water
(no soap, we will use it again in the next step). Get some flour on your
hands and knead the dough for about 10 minutes.

- We filled the bowl with water to make cleaning out the left over flour
easier. So first turn on the oven to about 350°F (To get the oven warm
not hot), and then clean the inside of the bowl. Using some olive oil,
grease the inside of the bowl. This makes it much easier to get the
dough out after it has risen. Place the kneaded dough into the container
and get the dough covered on all sides in the olive oil.

- Turn off the oven and check the heat inside it should be warm enough
that you can put and keep your hand inside without burning, but not hot
enough that the dough will cook. Place the bowl in the oven with a cloth
over the bowl and close the oven. Allow to rise for 1 hour.

- Once the dough has risen to about double in size, it’s time to take it
out of the oven. Punch the dough down and knead it a bit more. It is
recommended repeat this process of kneading and letting the dough rise a
second time, but usually I don’t have time for this. So, I stick with a
single rise.


- Take your dough ball and roll into a tube shape. Use some flour and
pinch the ends and cracks that may develop. Once it is the length of the
bread pan, stop and grease the pan with more olive oil. Try to coat the
dough in the olive oil in the pan and lay it such that the top is
smooth and not bumby on top.

- Turn the oven up to 190°C and place the cloth over the bread pan. Allow
the dough to rise till about one inch above the pan while the oven warms
up. Once ready place in the oven and set a time for 15 minutes. After
15 minutes, lower the oven temperature down to 170°C and allow to bake
for another 20 minutes. This is one place I differ from the original
instructions. At a 170°C I find 20 minutes sufficient to cook the loaf.
When I used 30 minutes I found that the crust of the top of the loaf
was too hard.

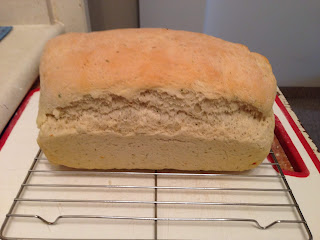
- Now pull the loaf out from the oven and place on a baking wrack. Allow
to cool for a couple hours before cutting into slices. Normally, I make
it at night then leave it overnight to cool and cut it in the morning.


Comments
Post a Comment